In this article you will see how to register your 3CX device to our gateway sip.orbtalk.co.uk
1. Outbound dialing:
You will have been provided with welcome documentation and will require the following Information:
- Username
- Password
- SIP Gateway
- DDI(s)
Select:
- >VoIP Provider
- >Add Provider
Then type in Orbtalk as the Name of Provider and select the Country dropdown box and select “Generic”, then for the provider select “Generic SIP Trunk”. Click ‘Next’. (See below).
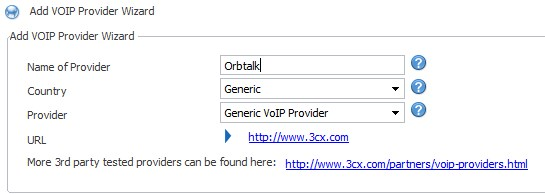
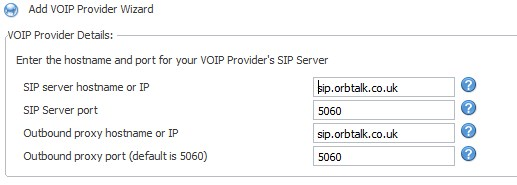
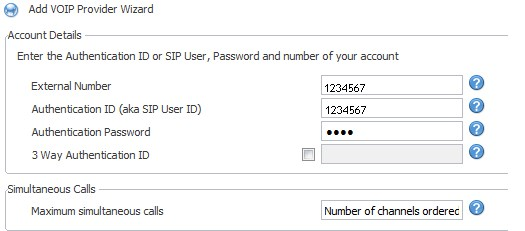
You will then be able to add in the SIP server details from your Welcome documentation.
Then you will be required to add the Authentication ID and Password information and number of channels/simultaneous calls available on the SIP trunk from your welcome documentation/email.

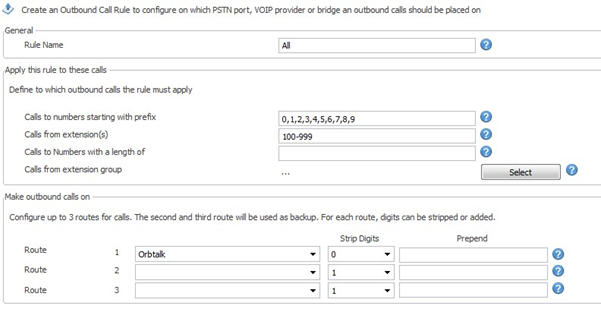
Finally, an outbound rule is required for the trunk to dial out. Orbtalk will strip leading ‘0’s or ‘00’ if sent and route the call in E164 format, so you do not need to strip digits (below). You could send a call in any of these formats to be routed: 0xxxxxxxxxx OR 0044xxxxxxxxxx OR 44xxxxxxxxxx
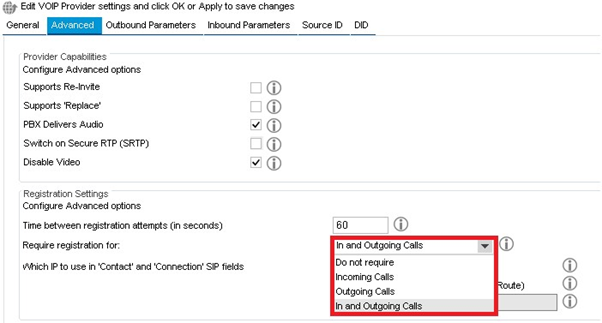
You will now (on the latest revision) need to go in to advanced and set the trunk to require registration for inbound and as shown below.
Test outbound routing by dialling out to landline and mobile.
Note: (For call forwarding add a second outbound rule mirroring the first WITHOUT the ‘Calls from Extensions’ field populated OR remove the extensions from the first rule and leave blank).
2. Inbound routing:
To receive inbound calls to supplied DID(s), select:
- >Voip Provider
- >Edit Provider
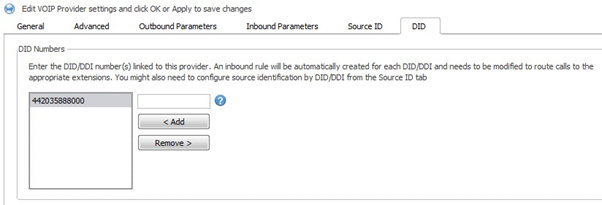
- >DID
Enter the full DIDs (in format advised in Welcome Documentation), click ‘<Add’ then scroll down and ‘Apply’.
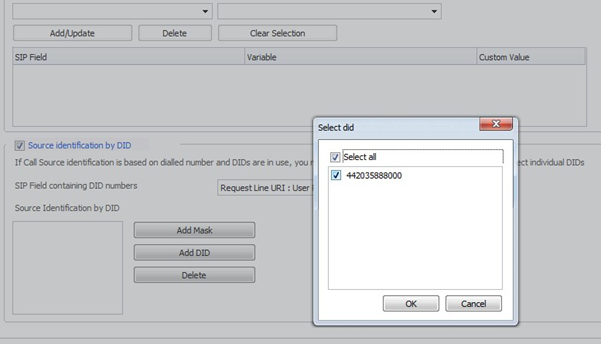
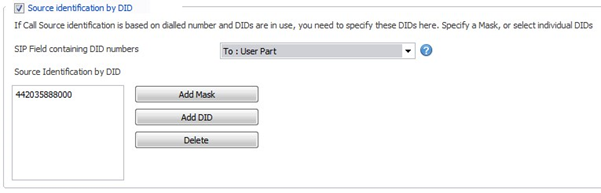
Once the DIDs are added select Source ID and check the box marked ‘Source identification by DID’. Click on ‘Add DID’ and select all DIDs and click ‘OK’, scroll down and ‘Apply’
Also set ‘SIP Field containing DID numbers’ as To: User Part
 Finally, go to:
- >Inbound rules
Click on ‘Edit DID’ and setup how you wish to direct calls that come Inbound to each DID and ‘Apply’.


Test inbound routing to 3CX on the DIDs and ensure that they route to the desired location(s).
3. Outbound DID
Any DID associated with the trunk can be presented outbound as a DID but it MUST be set in International format without any leading zero’s.
In order for DID presentation to be achieved by individual extensions we need to select:
- >VoIP Provider
- >Edit Provider
- >Outbound Parameters
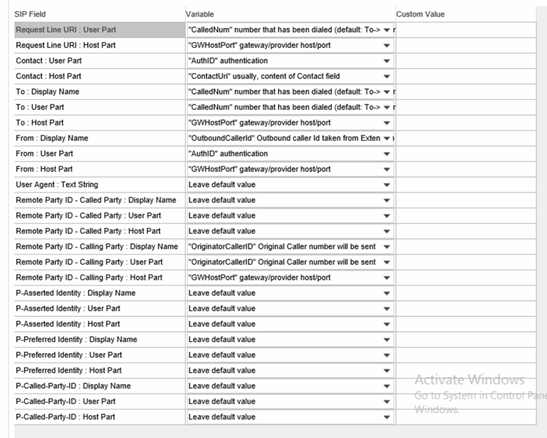
In Outbound Parameters the following should be the correct:
From : User Part = 'AuthID' authentication
From : Display Name = 'OutboundCallerID'
Click ‘Apply’ (see below).
If you would like to pass through your caller ID you will need to amend your settings as below.
And you will also need to amend the From : User part to AuthID
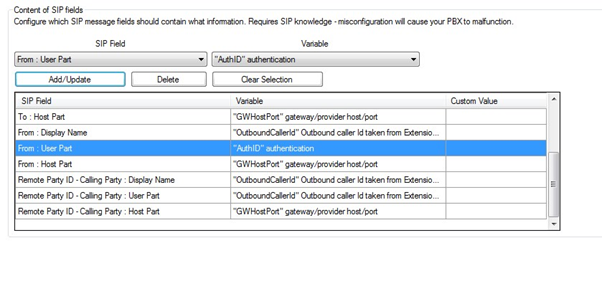
And you will also have to change the remote party ID to originator caller ID as shown below.
4. Ports and IP's
Please see the ports and IP’s that you will need to allow on your network below to make sure that you are able to have registration and media without any issues
Registration Domain
sip.orbtalk.co.uk

