 Each extension of your Cloud PBX system has access to a powerful web portal for managing voicemail, call routing, and more.
Accessing the Portal
-
To access the web portal
- Start a web browser.
- Go to https://portal.orbtalk.co.uk
- At the login page (see Figure 2-1):
- Click in the Login name field and type your username.
- Click in the Password field and enter your user password.
.png)
Figure 2-1. Login Page
Desktop Call Control
Desktop call controls appear when making or receiving a call. These controls allow you to see who is calling and manage a current call.
Incoming Calls
Incoming calls appear in a window in the portal similar to the one in Figure 2‑2. This window shows the caller ID name and number, along with Reject and Answer buttons.
- Selecting Reject sends the call to voicemail if available. The Answer button may not be available, depending upon your handset model.


Figure 2-2. Example of an Incoming Call
Active Calls
Figure 2‑3 shows an active call window that displays the caller ID and call time. The three controls at the bottom of the window let you hold, hang up, or transfer the call. If you select transfer, a field appears for entering the extension of the recipient. If you prefix the recipient’s extension number with 03, the call goes straight to voicemail.
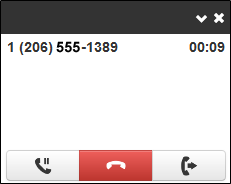
Figure 2-3. Example of Active Call Window
Home
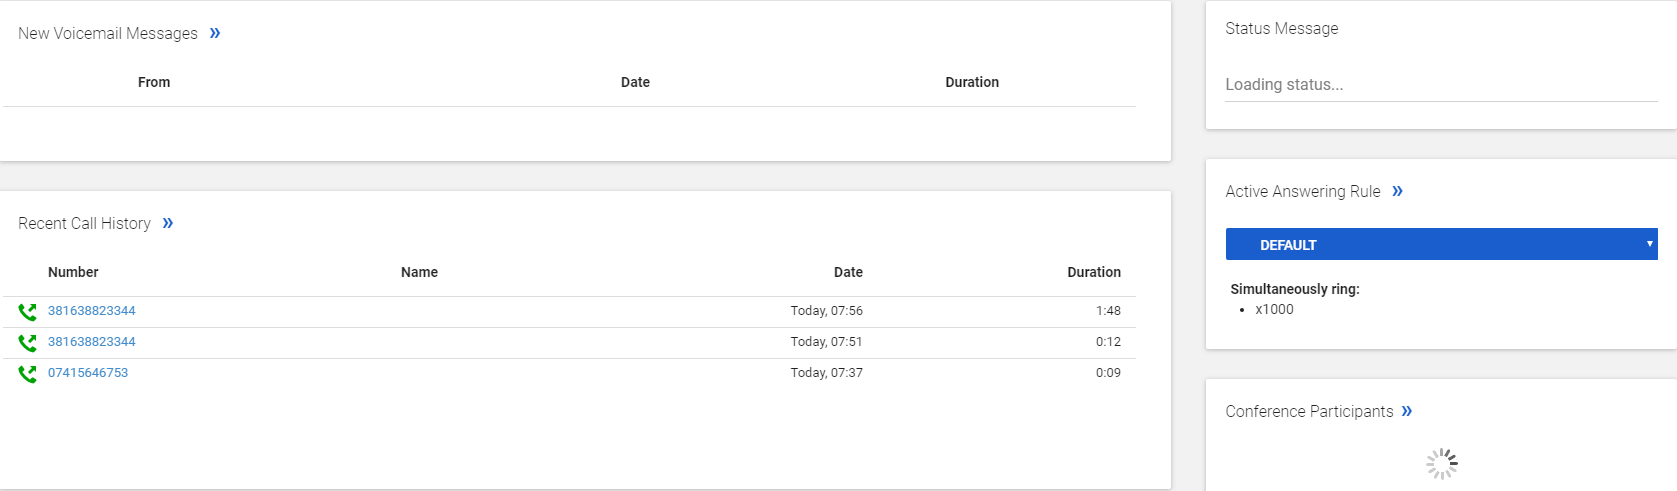
The Home page of your portal provides an at-a-glance view of everything going on with your extension. Table 2‑1 describes the areas on the Home page.

Figure 2-4. Example of Home Page
Table 2-1. Fields in the Home Page
| Field | Description |
| New Voicemail Messages | Shows new messages. You can play messages, click to call back, download, save and delete. To see all the controls, hover over the message. |
| Recent Call History |
Colour-coded icons show your recent calls.
To call back a number, click the phone number. |
| Status Message | Allows you to enter a status message that appears to other users of the portal. |
| Active Answering Rule | Your extension can have multiple answering rules. For example, you might ring your phone in one mode or forward to your mobile in another mode. In this field, you can choose which answering rule is the active rule. |
| Active Phones | Your extension may have multiple phones (for example, one in the office and one at home). This field shows which handsets are currently online. |
Voicemail
You configure voicemail using the Messages page. This page has two tabs for handling voicemail:
- Messages - see "Messages" below.
- Settings - see "Voicemail Settings" on the next page.
To display the Messages page, click the Messages icon at the top of the page:
Messages
The Messages tab allows you to manage your new, saved and deleted voicemail, as well as greetings and other settings.
Like the Home page, you can play messages, click a number to call it back and download, save, forward and delete messages. To see all the controls available, hover the mouse pointer over a message.
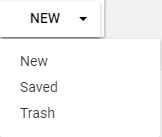
The New drop-down list allows you to review New, Saved and Trash (recently deleted) messages.
Voicemail Settings
Clicking the Settings tab displays options for controlling your voicemail order, time stamps, greetings and voicemail to email.
Table 2-2. Fields in the Settings Tab
| Field | Description |
| Enable Voicemail check box | Enables (check) or disables (uncheck) voicemail. |
| Inbox |
These options affect audio voicemail (calling in) but not the portal.
|
| Greetings | Allows you to select an active voicemail greeting, listen to it and record a new greeting.
|
| Unified Messaging |
Provides the following selections for adjusting your voicemail to e-mail settings.
|

Recording a Greeting
To record a greeting
- From the Settings tab of the Messages page, click the musical note icon:


A Manage Greetings page appears. - Next to New Greeting, click Record.
The Browse button changes to a Call me at field. - In the Call me at field, enter a number to call. This can be an extension or a telephone number such as your mobile phone.
- In the Greeting name field, enter a name for this greeting.
- Click the Call button.
- At the prompt, record the new greeting. When you finish the greeting, press #.
- Click Add Greeting at the bottom of the Manage Greetings page and then click Done to close the page.
Uploading a Greeting
To upload a greeting
- From the Settings tab of the Messages page, click the speaker icon

 .
.
A Manage Greetings page appears. - Hover over a greeting. Options appear for editing, deleting or renaming the greeting.
- Next to New Greeting, click Upload.
- Click the Browse button.
- In the Choose File to Upload dialog box, select a WAV or MP3 recording from your PC and then click Open.
The path and file name appear in the Browse field. - Click Upload.
- Click Add Greeting at the bottom of the Manage Greetings page and then click Done to close the page.
Recorded Name
If your company has a dial-by-name directory, you must record your name for the directory to be found. You can click the musical note button to listen to your current name recording on your PC, or to record or upload a new name recording.
Answering Rules and Time Frames
Though Answering Rules and Time Frames are separate tabs, they are so interconnected that describing them together makes sense.
Time Frames
Time frames allow you to control the scheduling of the system. You configure time frames using the Time Frames page. To display this page, click the Time Frames icon at the top of the page.
Three common time frames are:
- Open Hours (for example, M-F 9am-5pm)
- Holidays (Easter, Christmas, New Year's and so on)
- Closed Hours (all other times)
Time frames can be both shared (system-wide and set by the administrator) or personal to your extension. You can add a time frame to your extension by clicking the Add Time Frame. -
To add time frames
- From the Time Frames page, click Add Time Frame.
The Add a Time Frame page appears. - In the Name field, enter a name for this time frame.
- Next to When, select the time period when the time frame will be applied:
- Always = select this option if the time frame will always be applied. Click Save to complete the procedure.
- Days of the week and times = select this option to select days and times when the time frame will be applied. Proceed to "If you select Days of the week and times".
- Specific dates or ranges = select this option to specify a specific date or range of dates. Proceed to "If you select Specific dates or ranges".
- From the Time Frames page, click Add Time Frame.
If you select Days of the week and times
Options appear for selecting days and times when the time frame will be applied.
- Using the check boxes next to the name of each day of the week, check the days when the time frame will be applied. A blue line to the right of the checked day shows the default hours for this time frame (9:00 AM to 5:00 PM).
- To change the start time, drag the button on the left side of the blue bar either to the left to begin the start time earlier or to the right to begin the start time later.

- To change the end time, drag the button on the right side of the blue bar either to the left to shorten the time or to the right to lengthen the end time.
 Hint: To fine-tune start and end times, click start time or end time button and then use the left and right arrow keys on your keyboard to change the time in 5-minute increments.
 - By default, each day is made up of one time period. However, you can use the
 icon to define two time periods per day. For example, an office that answers calls in the morning and afternoon and then transfers calls to an answering service over lunch, on Mondays to Fridays. By doing this, you would create two time frames (for example, one from 8:00 AM to noon and another from 1:00 to 5:00 PM).
 - Click Save to save your selections.
The time frame appears as a row on the Time Frames page.
Hint: Moving the pointer over the blue text in the Description column shows the settings for that time frame.
If you select Specific dates or ranges
Fields appear for entering dates or ranges.
- Click in the top field and then select a starting date and time from the pop-up calendar.
- Click in the bottom field and then select an ending date and time from the pop-up calendar.
- To specify additional ranges, click the icon to display another row of fields and then repeat steps 1 and 2 in the new fields. Repeat this step for each additional date or range you want to specify. To delete a date or range, click the

 icon next to the appropriate row.
 - Click Save to save your selections.
The time frame appears as a row on the Time Frames page.
Hint: Moving the pointer over the blue text in the Description column shows the settings for that time frame.
Answering Rules
After you set up your time frames, you can create different answering rules for your time frames. You configure answering rules using the Answering Rules page. To display this page, click the Answering Rules icon at the top of the page.
The left side of the Answering Rules page has a Rings for n seconds drop-down list that allows you to specify the maximum ring time (one ring is generally 5 seconds). When that time expires, the caller will be forwarded to the Call Forward When Unanswered rule if defined; otherwise, the caller will be forwarded to voicemail if enabled. The right side of the Answering Rules page has buttons for adding answering rules and specifying allowed and blocked numbers.
The active rule is the topmost rule that matches the conditions in the corresponding time frame. You can change the order by using the arrows at the left of each rule to drag the rules.
To add an answering rule
- From the Answering Rules page, click Add Rule.
The Add an Answering Rule page appears. From this page, you can create rules to screen callers, forward calls and ring multiple numbers simultaneously. - Complete the fields in the Add an Answering Rule page.
- Click Save.
Table 2-3. Fields in the Add an Answering Rule Page
| Field | Description |
| Time Frame | Select the time frame when this answering rule will apply. |
| Do not disturb | No phone rings, goes straight to voicemail if available. |
| Call screening | Prompts caller to say their name, lets you screen the call before accepting. |
| Call Forwarding Always | Immediately forwards to the number specified. |
| Call Forwarding When Busy | Forwards calls to the number specified when your extension has used all available call paths. |
| Call Forwarding When Unanswered | Forwards calls to the number specified if the call is not answered after the specified ring timeout. |
| Call Forwarding When Offline | Automatically forwards if your desk phone loses communication (such as during a power outage). |
| Simultaneous ring |
Rings many phones at once. Check box options allow you to:
Note: A simring rings handsets, not extensions. So, for example, if 113 is listed, the simring will ring handset 113. If extension 113 has a call forward set to their mobile, however, the simring will not occur at the mobile. |
| Just ring user's extension | Rings just your phone. |
Call Forward Drop-down Options
When entering an extension as a call forward option, a drop-down list allows you to forward the call to specific resources associated with that extension. Table 2‑4 describes the options. Some options may not appear, depending on the features associated with the extension.
Table 2-4. Call Forward Drop-down Options on the Add an Answering Rule Page
| Field | Description |
| Handset | Bypasses the extension answering rules and forwards to the handset associated with the specified extension. |
| Extension | Forwards to that extension and follows the extension's answering rules. |
| Voicemail | Forwards to voicemail at the specified extension. |
| Queue | Forwards to the queue associated with that user. |
| IVR | Forwards to the IVR associated with that user. |
| Conference | Forwards to a Conference bridge. |
Ring Timeout
At the top of the page is the ring timeout selection. This option specifies the number of seconds that your phones will ring before going to voicemail (when available).
Allowing or Blocking Callers
The Answering Rules page has an Allow/Block button that allows you to permit or block calls from certain numbers. Using this feature, you can block unwanted calls to your phone, as well as calls from anonymous and unwanted numbers. Allowed numbers bypass user Do Not Disturb and Call Screening rules to ring through immediately.
- From the Answering Rules page, click Allow/Block.
The Allow/Block page appears. This page has two lists, one for allowed phone numbers (on the left) and another for blocked phone numbers (on the right). - To allow phone numbers, perform the following steps under Allowed Numbers:
- Click in the Enter a number field.
- Enter the number you want to allow.
- Click the
 button. The number appears in the Allowed Numbers list and a brief message tells you the allowed number was added.
 - To add more numbers, repeat step 2.
- To remove a number, click the
.png) button next to that number.
button next to that number.
- To block phone numbers, perform the following steps under Blocked Numbers:
- To block anonymous calls and calls from unknown numbers, check Block anonymous or unknown.
- When you are finished, click Done.
Contacts
By default, contacts contain all the extensions on your system. However, you can add contacts to enable easier access to everyone you need to reach.
You configure contacts using the Contacts page. To display this page, click the Contacts icon at the top of the page.
Filter and Search
The All pull-down list allows you to search contacts by group. Using this list, you can select groups to search such as Favourites, Departments, Available, Busy and more. Selecting a group filters the contacts on the page to show only the ones located in the group selected.
The Enter a name or extension field below the drop-down list allows you to search by contact name or extension. Entering a name or extension in this field filters the contacts on the page to show only the ones that match your entry.
Add and Import Contacts
The Add Contact button allows you to add a contact one at a time. These are for external contacts only. Your contact list will automatically update with your internal extensions.
Import will allow you to select a file from your PC; the import can accept CSVs from Microsoft Outlook and Gmail as well as vCards.
Adding a Contact
-
To add a contact
- From the Contacts page, click Add Contact.
The Add Contact page appears.
Complete the fields in the Add Contact page (see Table 2-5).
Click Save.
The contact appears on the Contacts page.
Table 2-5. Fields in the Add Contact Page
| Field | Description |
| First Name | Contact's first name. |
| Last Name | Contact's last name (surname). |
| Work number | Contact's work telephone number. |
| Mobile number | Contact's mobile telephone number. |
| Home number | Contact's home telephone number. |
| Contact's email address. |
Importing Contacts
To import contacts
- From the Contacts page, click Import.
The Import Contacts pop-up window appears. - Click the Browse button.
- In the Choose File to Upload dialog box, go to the location where the file you want to import is located. Click the file and then click Open.
The path and file appear in the Browse field. - Click Import.
The imported contacts appear on the Contacts page.
Selecting Favourites
When hovering over a contact, a light grey star appears next to the contact name. Clicking the star selects the contact as a favourite and changes the colour of the star to yellow.
Editing Contacts
When hovering over a contact you’ll see an edit button on the far right, click that button to edit the contact.
Phones
The Phones page allows you to manage your phones. To display the Phones page, click the Phones icon at the top of the page.
Each row shows a phone that has been added to the system, along with:
- Whether the phone is registered.
- The phone name and device type. The hyperlink below the Name column allows you to edit the phone information. You can also edit or delete phones using icons on the right side of the row.
- The phone's IP address, MAC address and line number on the phone associated with your extension.
Clicking the Refresh button 
 updates the information shown on the page.
The page has an Add Phone button that adds phones to your system. This task usually is performed by administrators and is not described in this guide.
SNAPmobile is a mobile app that turns your mobile phone into an extension of your Cloud PBX. Make and receive calls with the same identity as being in the office along with managing your voicemail, answering rules and contacts.
Music On Hold
Music on Hold allows you to specify personal music on hold for your extension. You configure music on hold files using the Music On Hold page. To display this page, click the Music on Hold icon at the top of the page.
The Add Music button allows you to add music on hold files. When you add music on hold files, the file name appears on the Music On Hold page, along with the duration and file size. The Settings button allows you to play an introductory greeting.
If you hover over a file you can see options to play the file, download the file, edit the name, or delete the file. If multiple files are uploaded you can rearrange them using the arrows at the left of the page.
Adding Music on Hold Files
To add music on hold files
- From the Music On Hold page, click Add Music.
The Add Music page appears. - Click the Browse button.
- In the Choose File to Upload dialog box, go to the location where the file you want to import is located. Click the file and then click Open.
The path and file appear in the Browse field.
NOTE: The music file must be in MP3 or WAV format and must be properly licensed. - In the SongName field, enter a name for the song.
- Click Upload.
The music file appears on the Music on Hold page.
Playing an Introductory Greeting
To play an introductory greeting before having the music on hold file play
- From the Music On Hold page, click Settings.
The Music on Hold Settings page appears. - Check Play introductory greeting.
To upload a greeting file:
- Next to New Greeting, click Upload.
- Use the Browse button to select the file.
- In the Greeting Name field, enter a name for the greeting.
- Click Save.
To record a greeting:
- Next to New Greeting, click Record.
- In the Call me at field, enter the number to call (either an extension or a telephone number such as your mobile phone).
- In the Greeting Name field, enter a name for the greeting.
- Click Call. Your phone will be called. At the prompt, record the new greeting and then press # when you finish your recording.
3. Click Save.
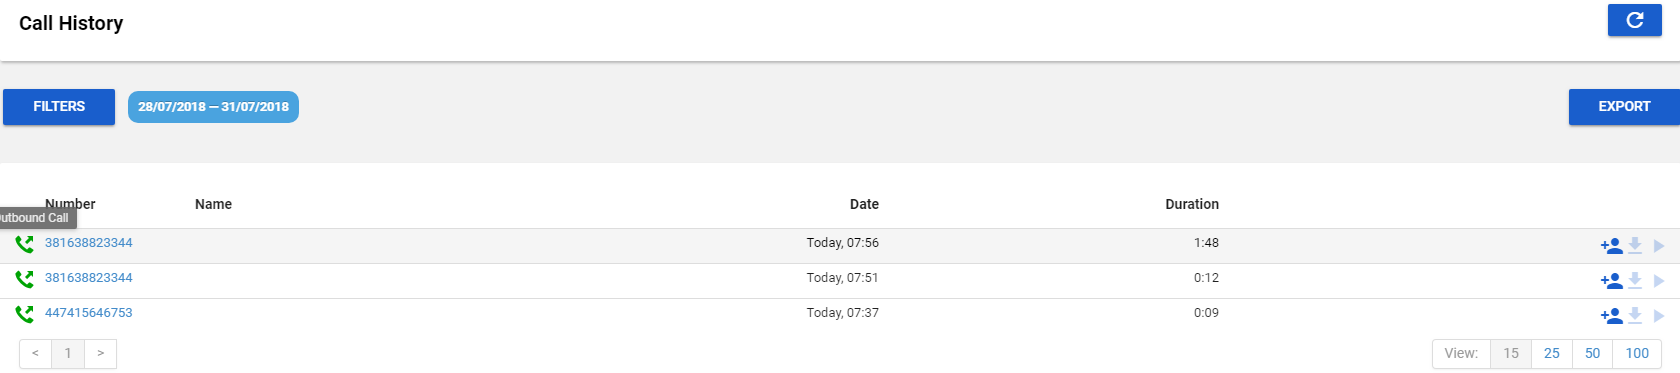
Call History
The Call History page shows a log of all your extension's calls. It also provides tools to filter and export data.
The left side uses colour-coded icons to represent call status:
- Green = outbound calls
- Blue = inbound received calls
- Red = missed calls
Moving your screen pointer over an icon displays a tool-tip with the call status. For example:
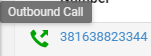
You can click a number in the Number column to dial back the number. Clicking the Refresh button .png) updates the information shown on the page.
updates the information shown on the page.
To display the Call History page, click the Call History icon at the top of the page.
The following figure shows an example of the Call History page. The sections following the figure describe the Filters and Export buttons.
Filtering the Call History
The Filters button allows you to filter the information displayed in the Call History page, so you can view only the information that interests you.
To filter the call history
- From the Call History page, click Filters.
The Call History Filters page appears. - Complete the fields in the Call History Filters page.
- Click Set Filters.
The Call History page appears, with only the items that match your criteria.
Table 2-6. Fields in the Call History Filters Page
| Field | Description |
| Date Range | To filter by a specified date range, click in the top field and then select a starting date and time from the pop-up calendar. Click in the bottom field and then select an ending date and time from the pop-up calendar. |
| Caller Number | To filter by a caller number, enter the caller's number. |
| Dialled Number | To filter by a dialled number, enter the dialled number. |
| Call Type | To filter by type of call, select a call type. |
Exporting the Call History Log
To export the call history log
- From the Call History page, click Export.
Depending on your browser, the history log is downloaded to your computer or you are prompted to save the log. The log is in comma-separated-value (CSV) format. - After downloading the log, you can open it using Microsoft Excel, Google Docs and other spreadsheet applications.
Profile
Clicking the Profile link at the top-right of the page displays the Profile page. From this page, you can configure the settings in Table 2‑7.
Table 2-7. Fields in the Profile Page
| Field | Description |
| First Name | The first name and last name will be shown in contacts and used in the dial by name directory. |
| Last Name | |
| Timezone | Your local time zone. |
| Email Address(es) | Address used for e-mail, password resets, etc. To add e-mail addresses, click the |
| Directory Options |
Enables or disables announce in audio directory and list in directory features.
|
| Caller ID Information | |
| Caller ID Name | For internal outbound calls, this is the name that recipients will see. |
| Caller ID | For external outbound calls, this is the number that recipients will see. |
| Change Password | |
| New Password |
8-digit numeric password for voicemail and the portal. Avoid using common codes like 0000 or 1234. For security, each typed password character is masked by a dot. Please keep this number secure. We will never call you to request your passcode. |
| Confirm New Password |

