The following guide is for configuring a 3CX PBX with a Orbtalk SIP trunk.
Note: This guide will work with 3CX version V20. Please make sure all updates have been installed.
You will need:
Your Orbtalk SIP trunk ID – You can find it by logging into your Orbtalk Account and going to SIP Services > Overview.
The Orbtalk password – You can set a password on your trunk by logging into your Orbtalk Account, goi to SIP services, then Trunks, select “Edit” on the trunk, select “Edit” next to the password field and enter a password. Hit "Save" and then “Confirm Operation”
The Orbtalk 3CX configuration Template - This can be found here or requested from the support team at support@telappliant.com.
Adding SIP Trunk
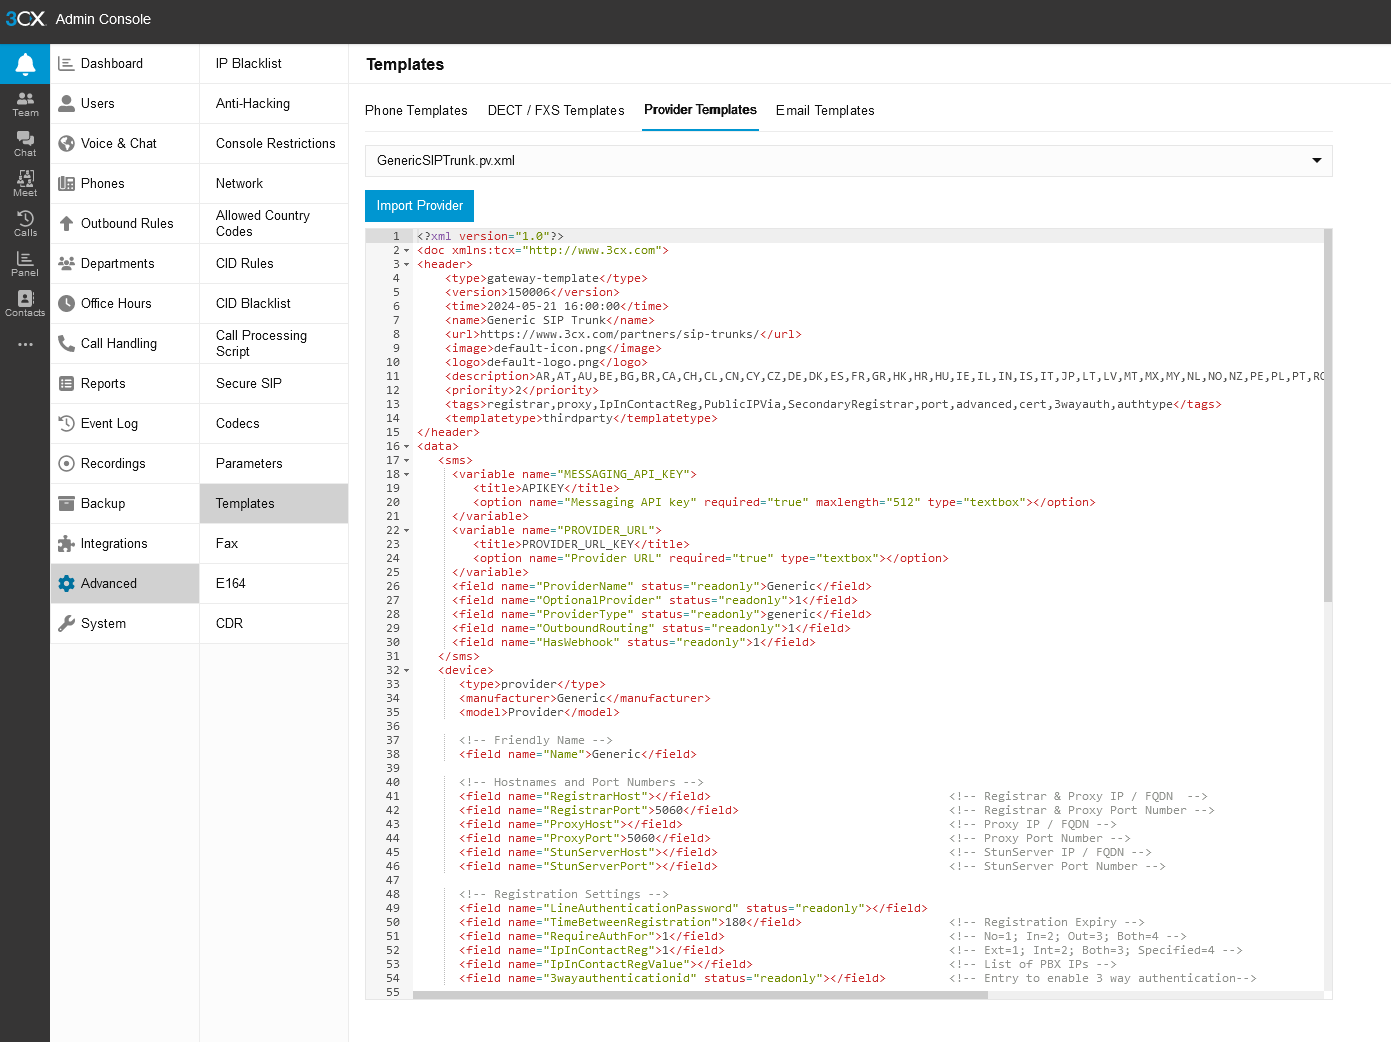
1-) Click on ‘Advanced’ from the left-hand menu and select ‘Templates’ then select Provider Templates then click “Import Provider”. Select the Orbtalk 3CX configuration Template and click "Import".
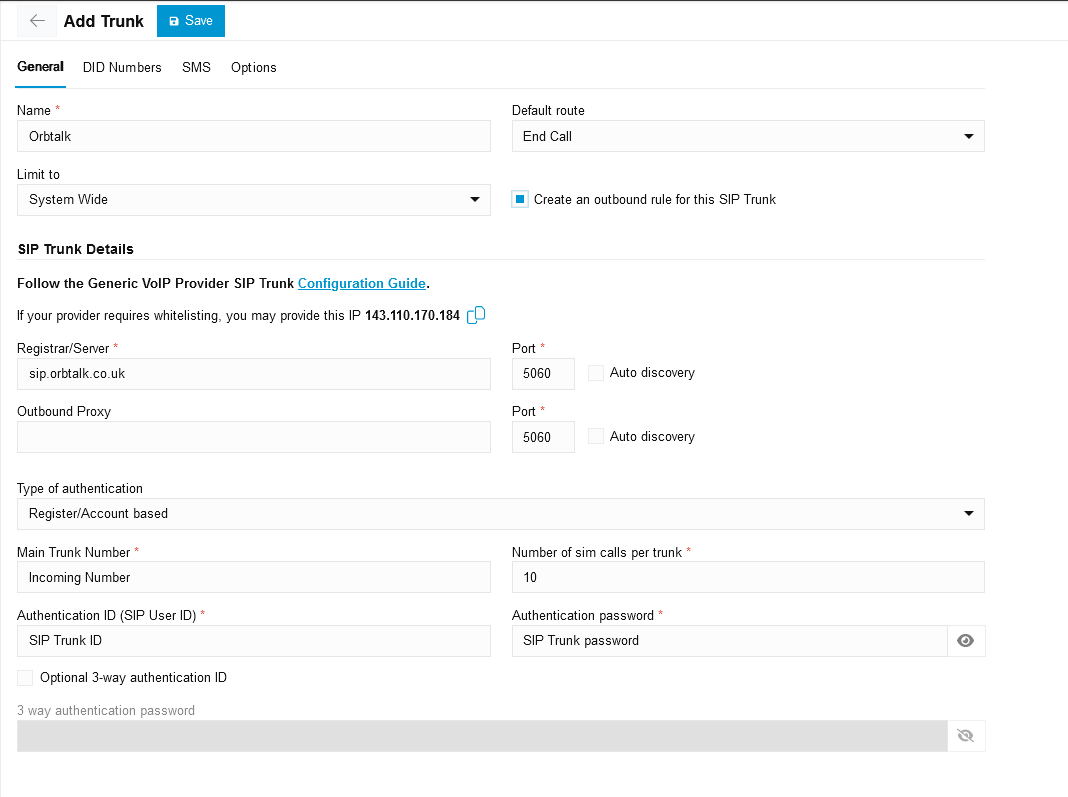
2-) You will now be taken to the “Add Trunk” Page. You will need to fill in the details of your Orbtalk Trunk in order to register.
Name of Trunk: Orbtalk
Default Route: Set the inbound routing for the Main Trunk number
Limit to: Set whether the trunk can be used system wide or only by a specific department
Create an outbound rule for this SIP Trunk: Enable this to automatically create an outbound rule for this SIP trunk
Registar/Server/Gateway Hostname or IP: sip.orbtalk.co.uk - 5060
Outbound Proxy: Leave blank
Type of Authentication: Set to Register/Account based
Number of SIM Calls: Set any value (a value less than or equal to the number of channels available for the account)
Authentication ID (SIP User ID): Your SIP Trunk ID
Authentication password: Your SIP Trunk password
Main Trunk No: Enter one of your Inbound numbers/DID's
3-) Click on the DIDs tab to add incoming numbers.
Click Add
Enter in the DID to be added
Hit Enter or click the Save icon
You may also import a list of DID's via the “Import” option. The trunk and DID's will need to be created prior to assigning them Inbound Routing.

4-) Click 'Save' at the top of the page to save these settings and create the Trunk.
Adding Outbound Rules
If you enabled “Create an outbound rule for this SIP Trunk” during SIP trunk creation you will automatically be brought to this page, start from step 2. If not start from step 1.
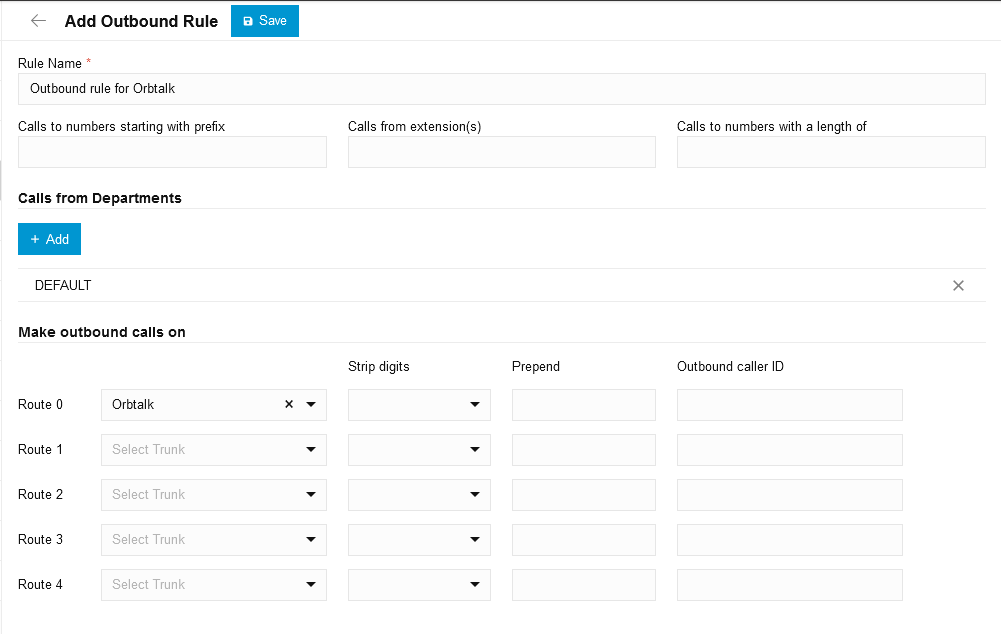
1-) Click on 'Outbound Rules' from the left hand menu and select 'Add button'.
2-) Enter the name for the new rule.
3-) Specify the criteria that should be matched for this outbound rule to be triggered.
4-) Click 'Ok' at the top of the page to save this rule.
Note: The below example uses the 'Default' extension group to define the numbers to which this rule will apply.
Routing inbound calls from Orbtalk to the PBX
1-) Go to www.portal.orbtalk.co.uk
2-) Click on 'Login' and enter your user name and password.
3-) Go SIP Services > Number Routing
4-) Click Edit on the number you want to reroute and select the trunk the 3CX system is registered against.
5-) Click “Save” and then “Confirm Operation”
6-) Your 3CX PBX is now ready to make and receive calls.

