- Using the web browser on your PC, navigate to www.gigaset-config.com or other known IP address.
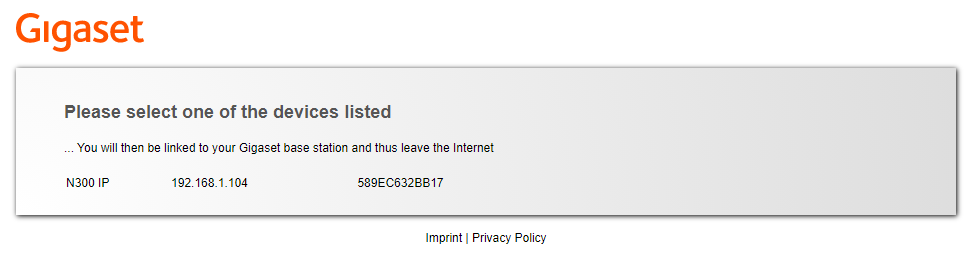
- Select the correct device.
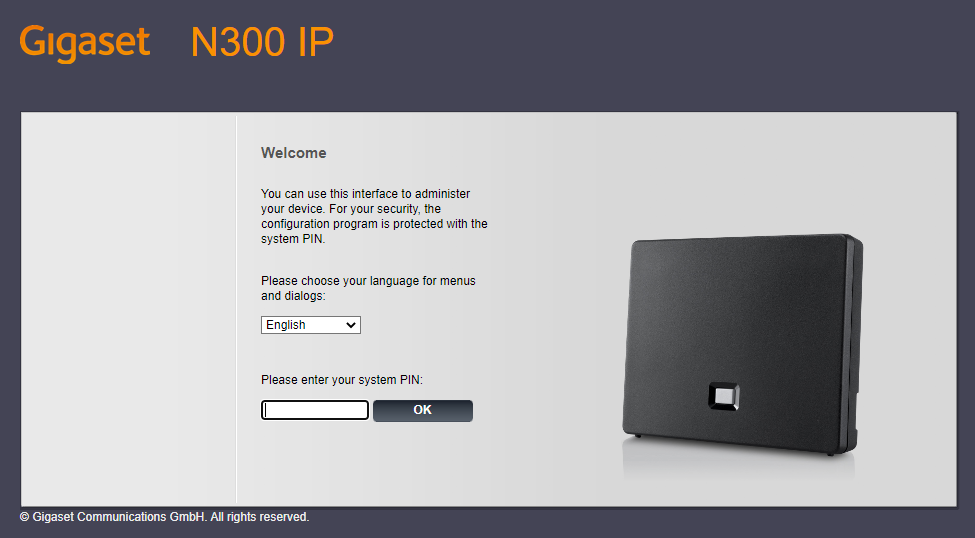
- In order to login, type in the system PIN. By default it is 0000
If the following page is shown, just click 'OK'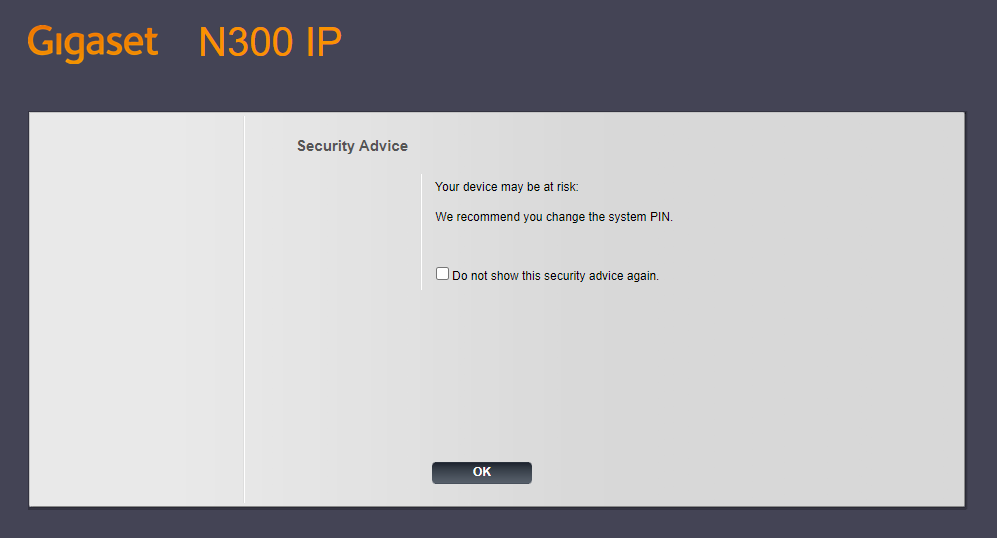
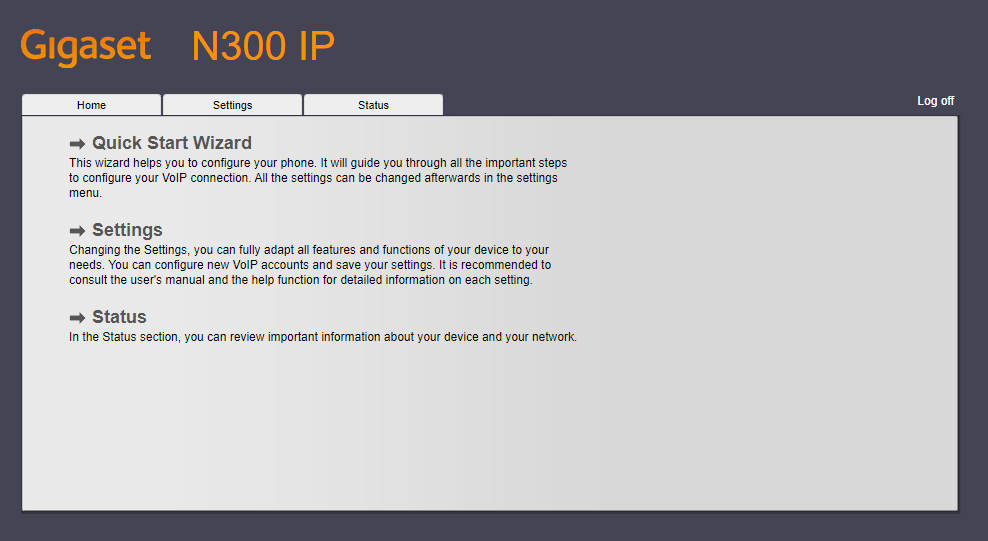
- Once on the 'Home' Tab. Click on the 'Settings' tab in order to begin configuration.
- In the left hand menu select 'Telephony'
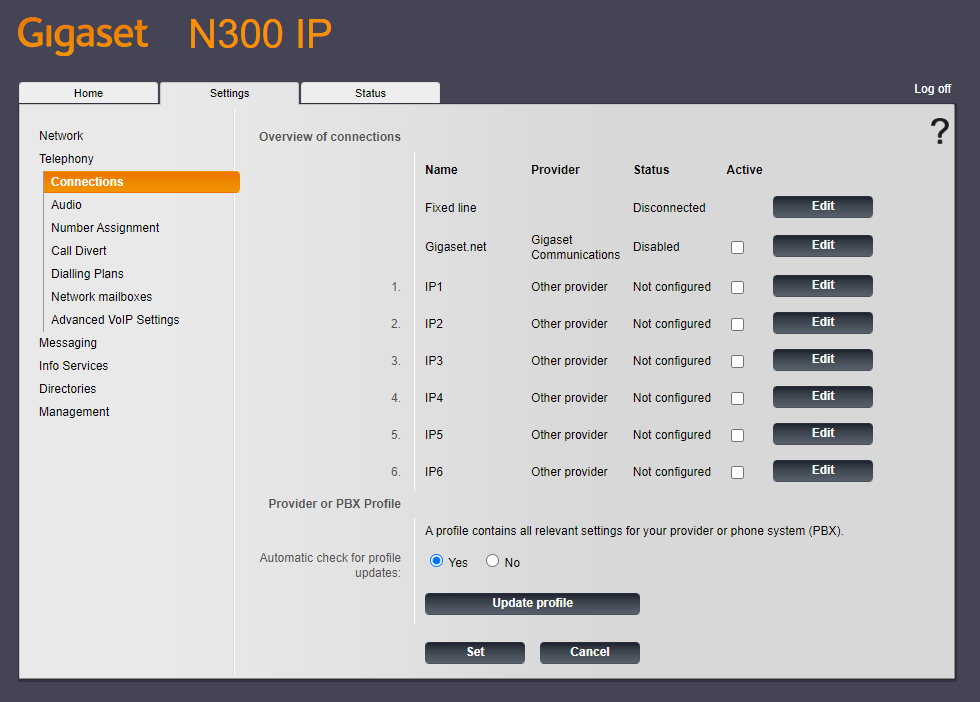
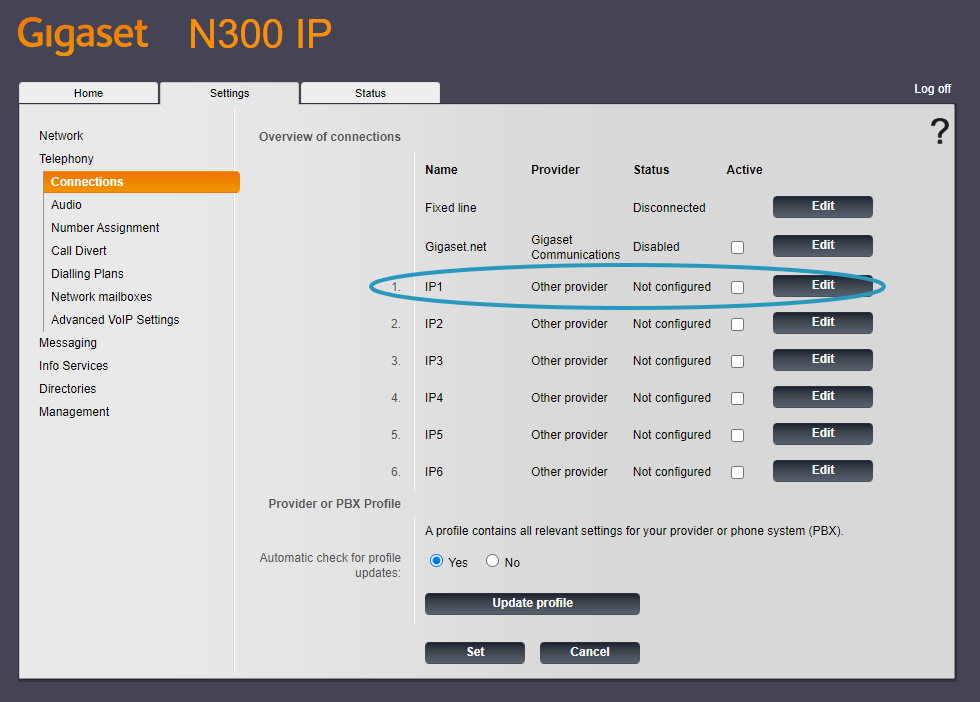
- Select the 'Edit' button in the account row you would like to configure. In this example 'IP1' will be used.
- Select 'Show advanced settings'
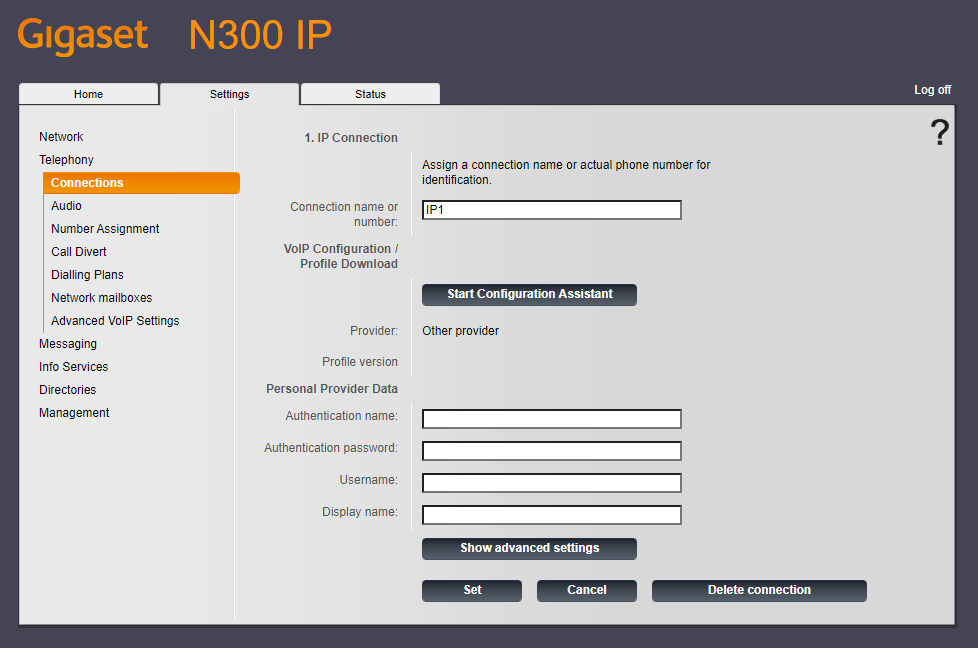
- The following settings need to be changed.
Connection name or number: VoIPOffice Extension
Authentication name: VoIPOffice Extension
Authentication password: VoIPOffice Extension Password
Username: VoIPOffice Extension
Display name: VoIPOffice Extension
Domain: VoIPOffice IP
Registration server: VoIPOffice IP
Outbound server address: VoIPOffice IP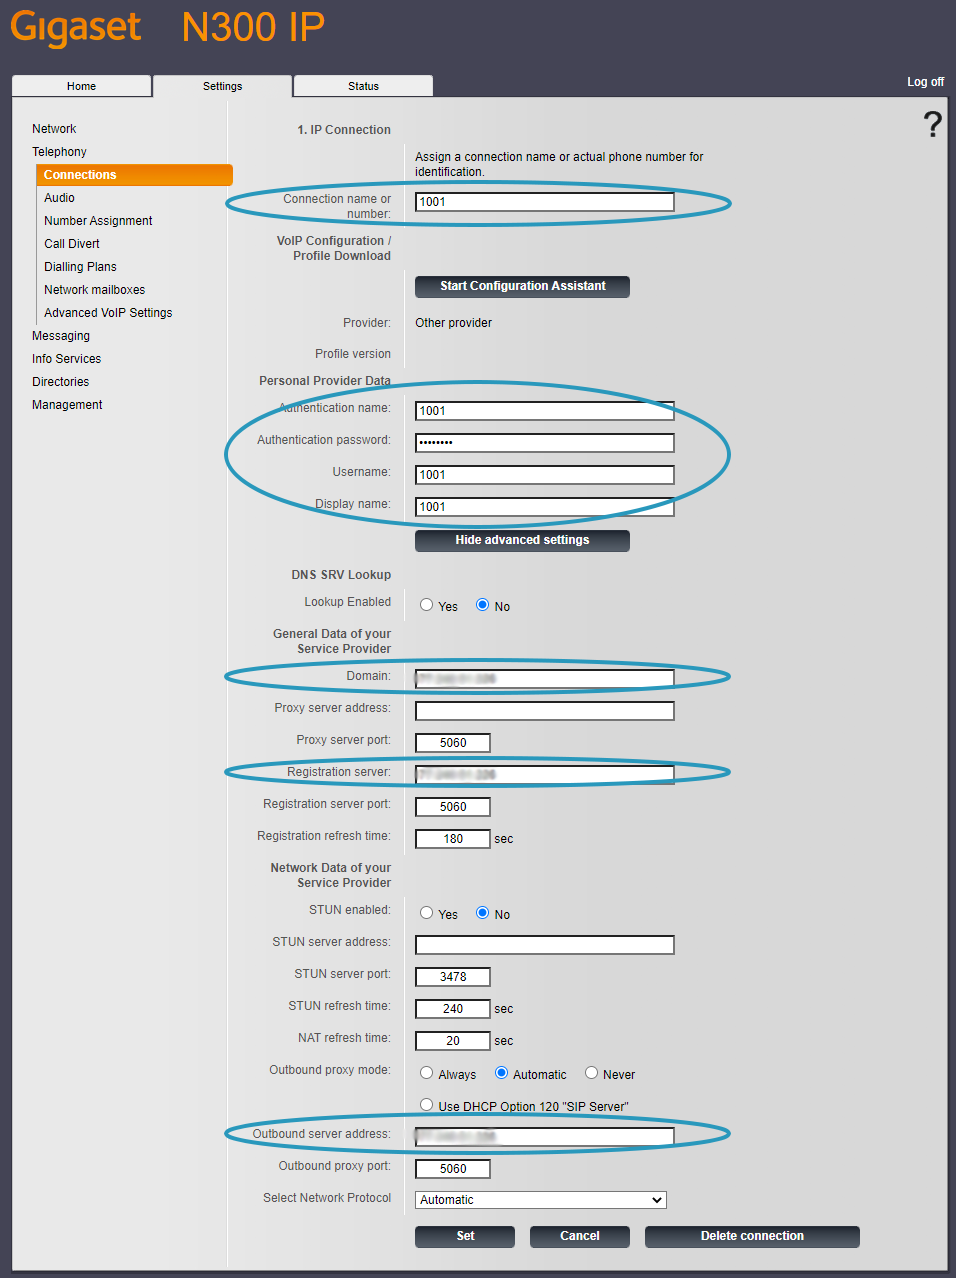
Click 'Set' to confirm and save the settings.
- Once configured ensure that the checkbox next to the account configured is selected. The status should change to 'Registered' after a few seconds.
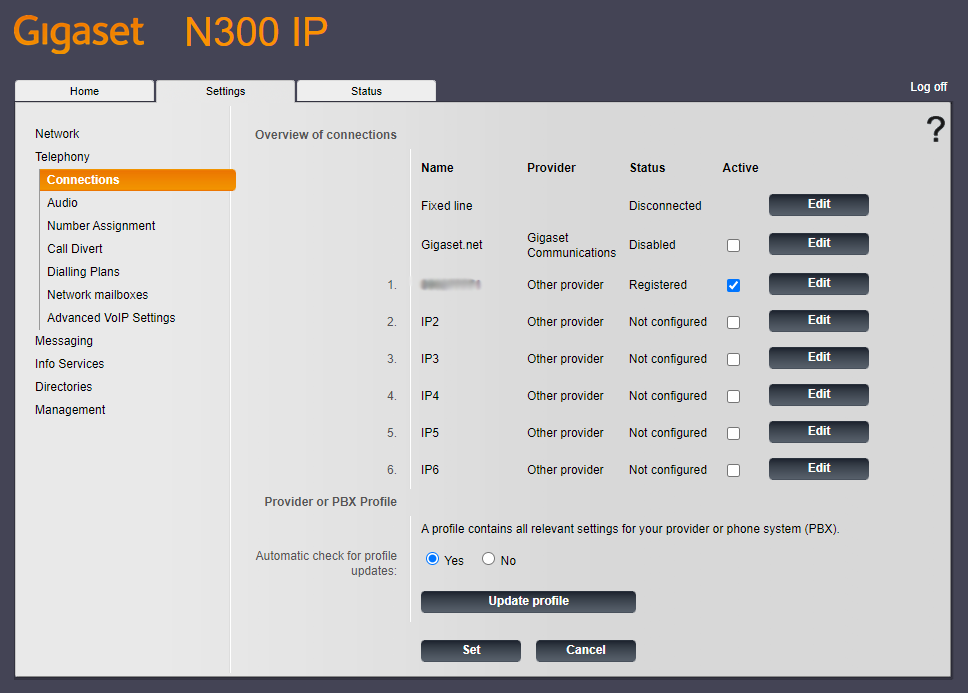
- Congratulations! Your phone should now be configured.
Still can't find what you are looking for?

Our award-winning customer care team is here for you.
Contact Support