The following guide is for configuring a Grandstream GXP 2140 with your VoIPtalk account.
You will need:
- The VoIPtalk ID – You can find it by logging to your VoIPtalk panel via the website voiptalk.org
- The VoIPtalk password – Go to the bottom of the page in case you need assistance with it.
- The Proxy / SIP server – "voiptalk.org"
- The Proxy port – "5060"
- The Outbound proxy server – "nat.voiptalk.org"
- The Outbound proxy port – "5065"
1-) Connect the handset and the computer to the same network using an Ethernet cable.
2-) Find the IP address of the handset by pressing the ‘OK’ button, then enter that IP address into the address bar of the connected computer; the following login screen should appear:

3-) Enter the username and password which are both ‘admin’ (case sensitive) by default.
4-) Once logged in, the following page should load. Note that, initially, all SIP registrations will read ‘NO’ in a red bar as none have been configured or activated yet:

5-) Hover the mouse over the ‘Accounts’ tab and choose any empty account, this being account 1 for new users. Click directly on the chosen account to open configuration screen:

6-) Enter the following details:
- Account Active: Switch to ‘yes’ to activate the account
- Account Name: Enter the VoIPtalk ID
- SIP Server: Enter ‘voiptalk.org’
- Secondary SIP server: Leave as blank
- Outbound proxy: ‘nat.voiptalk.org’
- BLF server: Leave as blank
- SIP User ID: Enter VoIPtalk ID
- Authenticate ID: Enter the VoIPtalk ID
- Authenticate password: Enter the VoIPtalk password
- Name: Any name
- Voicemail user ID: Leave as blank
The rest should remain as default.
7-) Click the ‘Save and Apply’ button and go to the ‘Status’ tab, if your configuration was successful, your account should be registered as a green ‘YES’ sign.
In case you are having issues getting your VoIPtalk ID and password, see below the way to retrieve them from your VoIPtalk control panel (login to www.voiptalk.org).
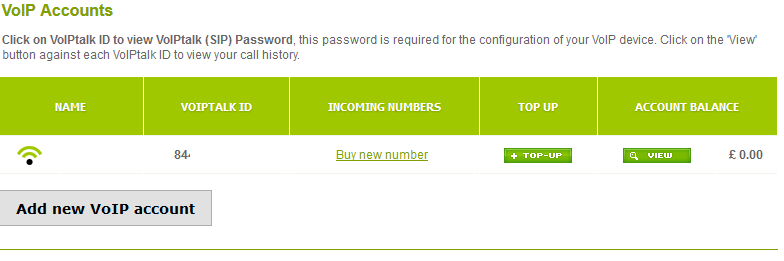
VoIPtalk ID: As shown on the screenshot above
Password: Found by clicking on your VoIPtalk ID and the following page should pop up, note that the arrow indicates where the password is shown:


